



Free UK Delivery
Online Designer
Price Promise
Credit Accounts

Embroidery vs Print: Which Is Best for Your Workwear and Uniforms?

Written By Ewa Labaj, Artwork Co-Ordinator

For a small company logo on polo shirts, fleeces or suitable jackets, embroidery is often the best choice. For detailed artwork, lightweight garments or large back logos, print is usually more practical. This guide compares embroidered and printed workwear by appearance, durability, cost and comfort, helping you choose the right branding for your team.

There is a common misconception that one method is always better than the other. In reality, the best option depends on the garment, the design of your logo and how the item will be used.

What is Embroidery?

Embroidery involves stitching a logo directly into a garment using coloured threads. Industrial embroidery machines work from digitised artwork to reproduce the design, creating a textured finish that is widely associated with premium, professional workwear.

Pros

Its main strengths are its smart appearance and exceptional durability. Because the design is stitched into the fabric, it does not crack or peel and copes well with regular washing. This makes embroidery particularly effective for uniforms that need to retain a polished corporate look through frequent use.

Cons

Embroidery is usually more expensive than print and is not always suitable for very small text, intricate detail, gradients or shading. It can add weight to lightweight garments, cause puckering on stretchy fabrics and feel uncomfortable when worn next to the skin. Large designs, such as embroidery across the shoulders, can become costly, while stitching through waterproof garments may compromise their waterproof performance.

What is Print?

Printed workwear is branded by applying ink or a transfer to the garment. Common methods include screen printing and transfer printing, including DTF, which stands for Direct to Film. At Bubble, our preferred method is DTF: full-colour artwork is printed using CMYK and white inks, an adhesive is applied to the reverse, and the transfer is bonded to the garment with a heat press. In this guide, our printing recommendations focus on DTF unless another method is specified; different printing methods can have different costs, finishes and care requirements.

Pros

Print reproduces fine detail extremely well, making it a strong choice for complex logos, gradients and vibrant colours. It can also have lower setup costs for some applications and is particularly well suited to large chest or back designs.

Cons

Compared with embroidery, print can look less premium and may eventually crack, fade or wear, depending on the application and how the garment is cared for. It may also be less suitable for industrial laundering.

Embroidery vs. Print: Side by Side Comparison.

At a glance: embroidery offers a raised, textured finish and suits small, simple logos on suitable fabrics. Print handles fine detail, gradients and large designs more easily. Embroidery costs are influenced by the amount of stitching; print costs depend on the method and application. For comfort, consider both the garment weight and the size of the branded area.

Appearance

Embroidery

Embroidery has a premium, traditional and corporate appearance. Its raised texture gives garments an upmarket finish, which is particularly effective for smart uniforms and customer-facing roles.

Print

Print creates a modern, bold look with strong visual impact. It is usually the better option for large graphics or designs intended to be seen clearly from a distance.


Durability

Winner: Embroidery

Embroidery is a strong choice for everyday workwear in demanding environments, particularly when uniforms are washed several times a week. Because the logo is stitched into the fabric, it can remain presentable throughout the garment’s useful life. However, durability still depends on the thread, stitching, fabric, wear and washing conditions; frequent washing is not a guarantee that the embroidery will remain unchanged.


Cost

Winner: Print (Usually)

Embroidery requires artwork to be digitised into stitch instructions, which can add a setup cost. It also takes longer to embroider a garment than to apply a DTF transfer, so DTF is often the lower-cost option, especially for large designs. However, the final comparison depends on the logo size, stitch count, order quantity and setup charges. Compare quotations for the same garments, quantities and branding positions rather than assuming print will always be cheaper.

As an illustration, a left-chest logo may have a price difference of around 25p to £2 per application. A large embroidered back design can cost up to £30 per logo, compared with around £2–£4 for a comparable print. These figures are indicative, not a quotation: actual prices depend on the artwork, branding size, order quantity and any setup charges.


Detail and Complexity

Winner: Print

Print is generally the stronger option when artwork contains small text, fine lines, gradients, multiple colours or highly detailed graphics. These elements can be reproduced more accurately on the surface of the garment than with individual stitches.

For example, a simple construction company logo containing clear text may suit embroidery, while a promotional campaign graphic or a festival line-up will usually be better printed.


Comfort

Winner Depends on Garment

For comfort, consider the size and coverage of the logo as well as the garment. Embroidery adds thread, weight and backing, although a small, simple logo may be barely noticeable. Print is often preferable for larger designs on lightweight clothing and sportswear, but a large, solid printed area can also change how the fabric feels and moves.

Which Garments Are Better Embroidered?

Polo Shirts

Embroidery is the industry standard for polo shirts because it creates a professional appearance suitable for office, trade and transport teams. It is often preferable to print on textured polo fabric, where the weave of the garment can show through a printed design.

Shirts and Blouses

Shirts and blouses lend themselves to a premium embroidered finish and are a popular choice for hospitality and other customer-facing teams. The correct backing should be used during embroidery to help prevent the fabric from puckering.

Fleeces

Embroidery is usually the most practical branding choice for fleece. The raised pile makes most printed applications unsuitable, so embroidery is generally the starting point when choosing how to add a logo.

Softshell Jackets

Softshell jackets are popular for embroidery because the stitched finish complements their smart, professional appearance. Where a jacket’s waterproof performance matters, check its suitability before choosing embroidery: stitching can puncture the fabric and may compromise that performance.

Other products that commonly suit embroidery include blazers, chefs’ jackets, aprons, beanies, bobble hats, caps, rucksacks and bodywarmers.

Which Garments Are Better Printed?

T-Shirts

T-shirts are cost-effective to print and provide a smooth, practical surface for larger logos and graphics.

Hi-Vis Clothing

Hi-vis clothing is particularly well suited to large printed back branding, where clear visibility and recognition are important.

Sportswear

Printing helps sportswear remain lightweight, flexible and comfortable, especially when the design is large.

Event or Promotional Clothing

For event or promotional clothing, print offers a lower-cost option that is well suited to short-term or campaign-based use.

Tote bags, party bags and waterproof jackets are also commonly printed. Printing is often preferable on waterproof garments because embroidery punctures the fabric and may affect its waterproof performance.

Industry Examples

Transport Companies

Transport companies often choose embroidered polo shirts and fleeces alongside printed hi-vis outerwear. This combination gives customer-facing employees a professional appearance while providing the durability needed for daily use.


Warehouse and Logistics

Warehouse and logistics teams commonly combine embroidered polo shirts with printed hi-vis vests and hoodies. This provides a practical balance between long-term durability, visibility and cost.


Construction

Construction businesses often use embroidery for everyday workwear and large printed back designs on hi-vis garments. The combination strengthens brand recognition while helping teams remain visible on site.


Hospitality

Hospitality businesses frequently embroider shirts, aprons and chefs jackets to create a premium appearance for customer-facing teams. Subject to the garment and thread specification, embroidery can also be a strong choice for uniforms that require industrial laundering.


Can You Combine Print And Embroidery?

Yes. Combining embroidery and print is often the most effective way to achieve the right balance of appearance, visibility and value.

A common approach is to embroider a company logo or name on the left chest and print a larger design on the back. A staff role or department can also be printed alongside embroidered company branding. This creates a professional finish at the front, strong visibility at the back and good overall value for money.


Before ordering personalised workwear, have your logo artwork, garment choices, quantities and preferred logo positions ready. Include the approximate design size, how the clothing will be used and how it will be washed. These details make it easier to compare embroidery and print on the same basis and identify any artwork or garment limitations before production.

Bubble Recommendations?

For most businesses, we recommend left-chest embroidery on polo shirts, fleeces and jackets, combined with print for larger back logos. This popular approach offers an effective balance of durability, appearance and cost.

The best result often comes from combining both processes: embroidery where a durable, premium finish matters most, and print where size, detail, flexibility or cost makes it the better choice. Not sure which suits your team? Contact Bubble with your logo, preferred garments and quantities to discuss the most suitable branding method for your order.

Frequently Asked Questions About Embroidery vs. Print.

Is embroidery more expensive than printing?

Embroidery is often more expensive than DTF printing, particularly for large logos, because it involves digitising the artwork and stitching the design. The difference may be small for a simple left-chest logo, but it usually increases as the embroidered area and stitch count grow. The final price also depends on the order quantity and setup charges.

Does embroidery last longer?

Embroidery is often a durable choice for frequently worn workwear because the design is stitched into the fabric rather than applied as a surface transfer. It does not crack or peel like a printed layer can, but its lifespan still depends on the garment, thread, wear and care. Neither method has a guaranteed lifespan simply because it is embroidered or printed.

Can embroidered logos be removed?

It may be possible to remove embroidery, but the garment may not return to its original appearance. Needle holes, fabric damage or an outline of the old design can remain. Treat an embroidered logo as a permanent branding choice rather than assuming it can be removed cleanly later.

Does printing crack or peel?

Printed designs can crack, fade or peel over time, but this is not inevitable. Performance depends on the print method, garment compatibility, application and care. Correctly applied DTF transfers can last well when cared for appropriately; follow the care instructions supplied for the finished garment rather than assuming every printed item has the same washing requirements.

Can I have embroidery and print on the same garment?

Yes. Combining embroidery and print is often the most effective way to achieve the right balance of appearance, visibility and value.

Is print better for detailed logos?

Print is generally the stronger option when artwork contains small text, fine lines, gradients, multiple colours or highly detailed graphics. These elements can be reproduced more accurately on the surface of the garment than with individual stitches.

What's best for hi-vis workwear?

The best choice depends on the particular hi-vis garment. Vests are often printed because this is a practical, cost-effective way to add a large logo. Higher-value jackets may suit a small embroidered chest logo with a printed back design, but embroidery is not suitable for every garment. Confirm the proposed branding method and placement with the supplier before ordering, rather than assuming both methods work equally well on all hi-vis clothing.

Which decoration method is best for sportswear?

Print is often the better starting point for lightweight sportswear, especially for larger logos, because embroidery adds thread and backing. However, print coverage also matters: a large, solid design can affect how the fabric feels and moves. Choose the method and design size together rather than treating printing as automatically more comfortable.



Back to News

COMPANIES WE HAVE WORKED WITH

disney
John Lewis
Warrington Wolves
warrington Borough Council
O2
Jiffy Packaging
Vanarama
Your cart is empty

Select Currency

{CC} - {CN}
 

Select Size


Extra Product Options


    Please enter your Layout name


    Select Type Of TextSelect Type Of Initials/namesSelect Type Of LogoSelect placeholder type


    Please enter your text


    Select a design

    Please wait while the image gallery loads


    Confirm Request Quote

    You will be redirected to a page where you can request a quote for this blank product. Any decorations you have added to this product will be removed.


    Select product

    Select product

      Products


      How many colours are in this design?

      You now have multiple elements making up this screenprint design

      Select the colours that appear in your design.

      You need to specify the total number of unique colours used across all the elements in your design.

      This helps us determine the pricing based on the number of colours in your design.

      • (plus white base)

      You can also specify the colours used in your design eg "Red", "Blue", "pantone 1809".

      If you dont tell us, our professional designer will work it out for you.

      • (plus white base)

      Currently selected Colours


      How many colours are in this design?

      • coloured image
      • original image

      How many colours in your design?

      4 Colours

      Select the colours to be used

        COLOR PICKERS GO HERE
       

      Your Cart

      Products Qty Price
      Total ÂŁ0.00
       

      Re-use existing screen print designs

      You have already used screen printing in this order. To avoid additional screen costs you can re-use an existing screen print design for this product.

      You can

      Re-use existing designs

      or


      WarningError

      Your layout contains images that have been resized to the point where they may appear blurred.

      Below-quality images listed

      Your layout contains images that appear outside the design area.

      You cannot save the product until you have moved the images within the design area.

      Your layout contains images that appear outside the design area.

      Your layout contains overlapping images.

      You cannot save the product until you have moved the images so they are not overlapping.

      Blank product purchase is not allowed

      You will not be able to purchase this product until you add a decoration design.

      Inactive blank product in use

      Product minimum quantity requirements not met

      You will need to increase the specified quantity to add this item to your cart.

      Process minimum quantity requirements not met

      Screen(s) still updating...

      You will not be able to purchase this item until all re-used screens have been updated.

      Your layout contains images that have been resized to meet the 25 megapixel limit for raster images and they may appear smaller than intended. You can avoid the raster size limit by uploading artwork in vector format when possible.

      By clicking OK, you are agreeing to accept the final product regardless of image quality. Click Cancel if you want to go back and fix the images.


      Add Initials/names


      Edit Initials/names.

      Add Another Initials/names
       

      Uploading file


      Get Started 

      You can decorate this product using the buttons below. If you want to change the product, select the "products" tab then choose the product you want to decorate
      • Add Logo

        Add a logo to the selected product
      • Add Text

        Add text to the selected product
      • Add Initials/names

        Add initials/names to the selected product


      Online Designer Help 

      The Designer is an easy to use tool that allows you to design your own product. You can select a product to decorate with stock art, your own designs or photos and text.

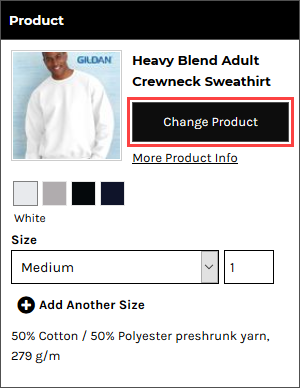
      To change the currently selected product:

      1. Click on the Change Product button in the Product panel.
        Product Button

        The Select Product popup will be displayed.

        Product Details Panel.png
      2. Click on a product to select it.

      To add text to a product:

      1. Click on the Add Text button in the Designer Toolbar.
        Add Text Button
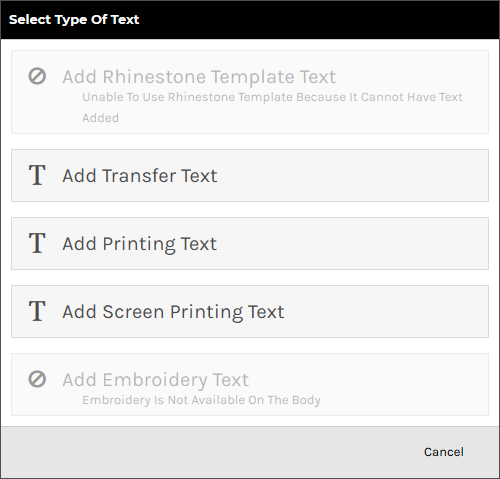
      2. Select the type of process to be used for the text in the Select Type of Text popup. Only options that are supported by the product being decorated will appear.
        Select Type Of Text Popup
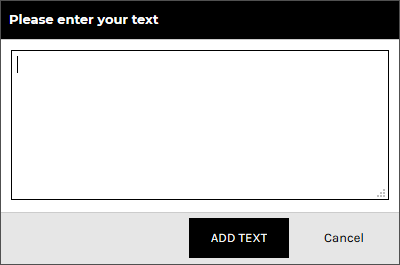
      3. Enter the text, and click ADD TEXT.
        Please Enter Your Text Popup

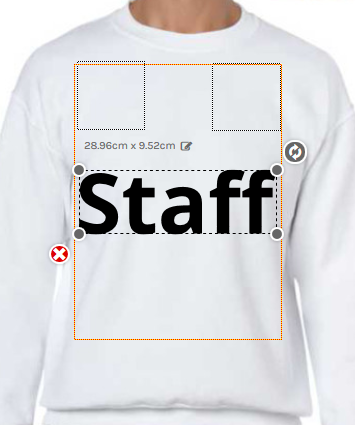
        The text will appear inside the decoration area in its bounding box with editable size dimension, resize and rotate handles and delete control available.

        Inserted Text

      To adjust text properties:

      1. Click on the View and organize layers button in the View Toolbar.
        View And Organize Layers Button
      2. Click the text object you wish to adjust the properties of.

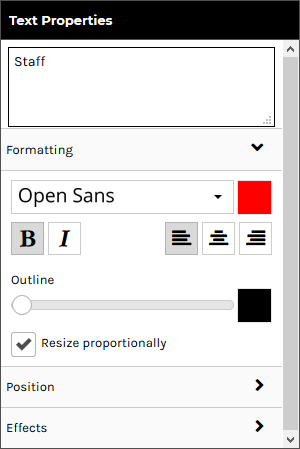
        The Text Properties panel will appear on the left side of the Designer.

        Text Properties Panel
      3. Configure the text as required:
        • Text Box: lets you edit the text.

        Formatting

        The Formatting tab is expanded by default and contains the following controls:

        • Font: change the font via the Select A Font popup.
        • Font color: change the text color via the color popup.
        • Bold: boldens the text.
        • Italics: italicizes the text.
        • Left-align: aligns text to the left when it spans multiple lines.
        • Center-align: center-aligns text when it spans multiple lines.
        • Right-align: aligns text to the right when it spans multiple lines
        • Outline: lets you apply an outline to the text. At the leftmost position on the slider, no outline is applied. Moving the slider to the right applies an outline that increases in thickness the further right it is moved.
        • Outline Color: lets you set the color of the outline via the color popup.
        • Resize Proportionally: when this checkbox is ticked, the text will keep its original proportions when you resize it.

        Position

        Effects are only available for the direct to garment printing decoration process.

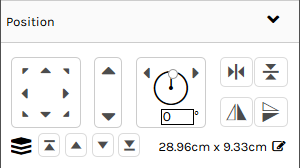
        Click on the Position tab to expand it. Expanding the Position tab reveals the following controls:

        Position Controls
        • Position controls: lets you move the selected text within the decoration area using any of the eight directional arrows.
        • Size controls: lets you increase/decrease the size of the selected text by clicking on the up/down arrows.
        • Rotation controls: lets you turn the selected text around its center axis. You can do this by:
          • Specifying a specific angle at which to rotate the text.
          • Clicking on the left arrow to rotate the text 5 degrees to the left.
          • Clicking on the right arrow to rotate the text 5 degrees to the right.
        • Horizontal Centering controls: Horizontally centers the selected text within the decoration area.
        • Vertical Centering controls: Vertically centers the selected text within the decoration area.
        • Layering controls: lets you change the layer at which the selected text is positioned in relation to other decorations.

        Effects

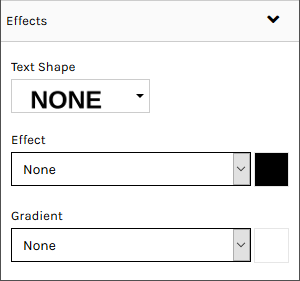
        Click on the Effects tab to expand it. Expanding the Effects tab reveals the following text effects:

        Effects Controls
        • Text Shape: lets you alter the shape of the text. The options indicate the shape that they will apply.
        • Effect: lets you add a shadow or glow effect to the text.
          • None: no effect is applied.
          • Shadow: applies a drop shadow to the text.
            • Offset: lets you set the position that the shadow will be offset from the text.
            • Blur: lets you set the level of blurring effect that will be applied to the shadow.
          • Glow: applies the appearance of a glow around the text.
            • Strength: lets you set the intensity of the glow.
            • Blur: lets you set the level of blurring effect that will be applied to the glow.
        • Effect Color: lets you set the color of the Effect via the color popup.
        • Gradient: sets a horizontal or vertical gradient of color between the selected font color and the gradient color.
        • Gradient Color: lets you set the color of the Gradient via the color popup.

      To add a design using the Add Design button:

      1. Click on the Add Design button in the Designer Toolbar.
        Add Design Button
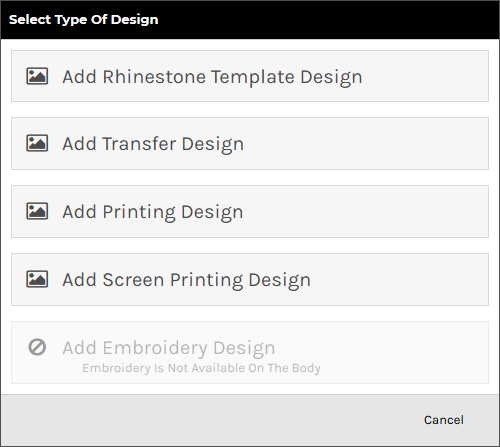
      2. Select the type of process to be used for the design in the Select Type of Design popup. Only options that are supported by the product being decorated will be enabled.
        Select Type Of Design Popup
      3. Browse to and click on the design you want to add in the Select a design popup.
        Select A Design Popup

        You can select designs from the following sources:

        • Upload a new design: Click on Upload Image to upload a design from your device.

          Raster, vector, and embroidery file types are supported in the formats as listed below:

          • Raster (PNG, JPG, JPEG, GIF, TIF)
          • Vector (CDR*, PDF, EPS, PS, SVG, SVGZ)
          • Embroidery (EMB)

          Vector based graphics will have modifiable elements such as text and colors editable on the fly by users.

          *CDR requires the CorelDRAW app to be enabled. When a CDR file is uploaded it will be automatically converted to SVG format so that it can be modified in the Online Designer.

        • Your own previously uploaded design designs: These will appear under the Upload Image button if you have uploaded designs before.
        • Instagram: Click on the Instagram button and enter your credentials to access your Instagram pictures.
        • Facebook: Click on the Facebook button and enter your credentials to access your Facebook pictures.
        • Store Designs: designs exclusive to the store.
        • Stock Designs: Third-party designs available for use in DecoNetwork.
      4. Click SELECT DESIGN.

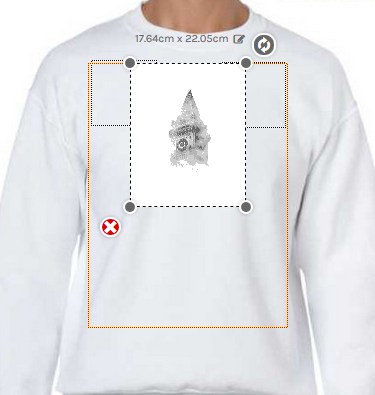
        The design will appear inside the decoration area in its bounding box with editable size dimension, resize and rotate handles and delete control available.

        Inserted Design

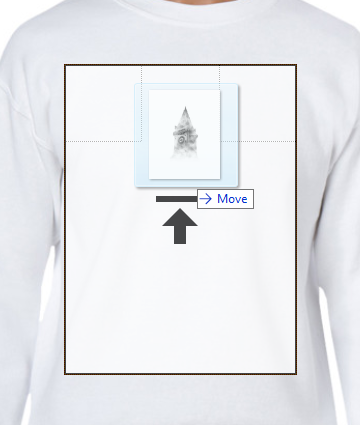
      To add a design by drag and drop:

      1. Drag a design file from your computer into the decoration area of the product in the Designer.

        The decoration area will be highlighted when the mouse pointer is within its boundaries.

        Highlighted Decoration Area
      2. Release the mouse button to drop the design into the decoration area.

        The Select Type of Design popup will be displayed with the supported decoration types enabled for the product selected.

        Select Type Of Design Popup
      3. Select the decoration process you want to be used for the design.

        The system will begin uploading the design file to your own design library.

        Uploading Design.png
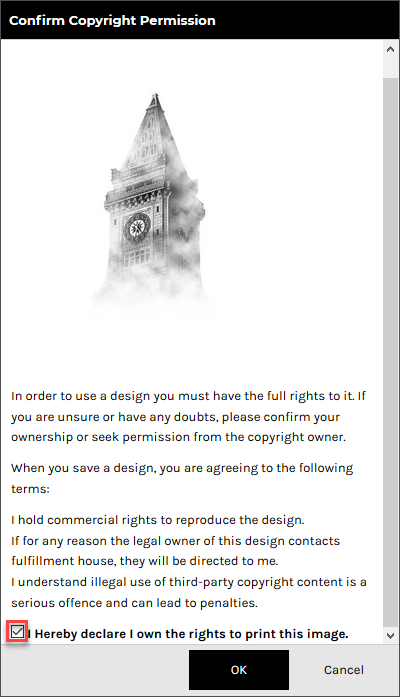
      4. Tick the, I hereby declare I own the rights to print this image, checkbox in the Confirm Copyright Permission popup to verify that you have permission to use the design.
        Confirm Copyright Permission Popup
      5. Click OK.

        The design will appear inside the decoration area in its bounding box with editable size dimension, resize and rotate handles and delete control available.

        Inserted Design

      To adjust design properties:

      1. Click on the View and organize layers button in the View Toolbar.
        View And Organize Layers Button
      2. Click the design object you wish to adjust the properties of.

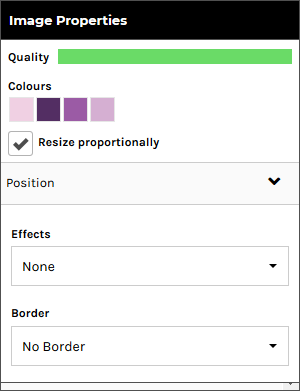
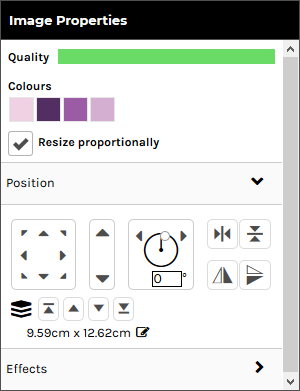
        The Image Properties panel will appear on the left side of the Designer.

        Image Properties Panel
      3. Configure the design as required:
        • Quality: Shows you a bar indicating how clear the image is for printing. The indicator reflects how well the raster-based graphic is going to print before blurring too badly. If this drops below a certain threshold, the system will warn the customer that their print quality will be compromised.

          This option is only available for raster designs.

        • Colors: Shows you the colors currently used in the design.
          • edit: Click on the link to edit the design colors.

          This option is not available for designs that have restrictions on customizing.

        • Resize Proportionally: when this checkbox is ticked, the design will keep its original proportions when you resize it.

          This option is not available for embroidery, transfer and rhinestone designs.

        • Ungroup: click on the link to ungroup the design into its component elements.

          This option is only available vector-based designs.

        Position

        Click on the Position tab to expand it. Expanding the Position tab reveals the following controls:

        • Position controls: lets you move the selected text within the decoration area using any of the eight directional arrows.
        • Size controls: lets you increase/decrease the size of the selected text by clicking on the up/down arrows.
        • Rotation controls: lets you turn the selected text around its center axis. You can do this by:
          • Specifying a specific angle at which to rotate the text.
          • Clicking on the left arrow to rotate the text 5 degrees to the left.
          • Clicking on the right arrow to rotate the text 5 degrees to the right.
        • Horizontal Centering controls: Horizontally centers the selected text within the decoration area.
        • Vertical Centering controls: Vertically centers the selected text within the decoration area.
        • Layering controls: lets you change the layer at which the selected text is positioned in relation to other decorations.

        Effects

        Click on the Effects tab to expand it. Expanding the Effects tab reveals the following controls:

        Image Properties Panel - Effects Section

        These options are only available for raster designs.

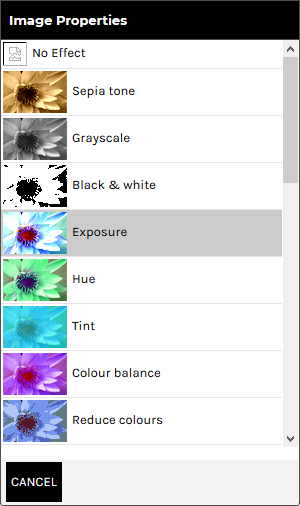
        • Effects: lets you apply a special effect to the design that alters its appearance. Click on the Effects drop-down box to see the effects options.
          Effects Options

          Click CANCEL to return to the Effects Panel.

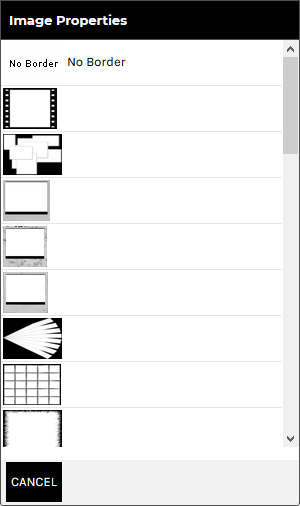
        • Border: lets you apply a border to the boundary of the design. Click on the Borders drop-down box to see the border options.
          Border Options

          Click CANCEL to return to the Borders Panel.


      To specify product sizes and quantities:

      1. Click on the Product button in the Designer Toolbar.
        Product Button

        The Product panel is displayed.

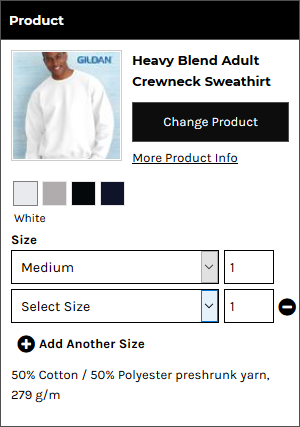
        Product Panel
      2. Select a size from the Size drop-down list and specify the quantity required in the input box for that size.
      3. Click Add Another Size to specify quantities for each size required.
        Another Size Fields

      To specify product size and quantity when products are sold in bulk:

      1. Click on the Product button in the Designer Toolbar.
        Product Button - Bulk Quantity

        The Product panel is displayed.

        Product Details Panel - Bulk Quantity

        The Quantity field will show the minimum quantity you can purchase.

        Note, you can not select multiple sizes when products are sold in bulk.

      2. Select a size from the Size drop-down list in the Product Panel.
        Product Details Panel - Size Dropdown
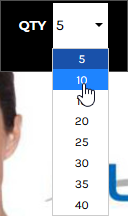
      3. Select a quantity from the QTY drop-down list in the Designer Toolbar.
        QTY Dropdown

      To arrange design layers:

      1. Click on the View and organize layers button in the View Toolbar.
        View And Organize Layers Button

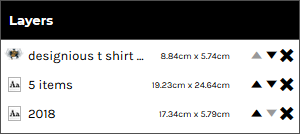
        The Layers panel is displayed showing all the text and design objects present in the decoration area.

        Layers Panel
      2. Arrange the elements as required:
        • To move a layer up, click on the up arrow to move it to a new position in the list. Likewise, to move a layer down, click on the down to move it to a new position in the list.
        • To delete a layer, click the cross icon at the right of the layer.

      To re-group template design elements:

      You can group elements from a template design that you have ungrouped.

      1. Click on the View and organize layers button in the View Toolbar.
        View And Organize Layers Button

        The Layers panel is displayed showing all the text and design objects present in the decoration area.

        Layers Panel - Ungrouped Elements
      2. Hold down the Ctrl key and click on each layer you want to be grouped.
      3. Click on the Group Selected Items button in the View Toolbar.

      To add team names:

      "Team name" allows automatic formatting of text in the form of a small name and large number beneath, decorated onto the product. This is useful for teams and other groups who would like a jersey-style name and number on their product.

      1. Click on the Add Team name button in the Designer Toolbar.
        Add Team Name Button
      2. Select the decoration process you want to be used for the team names.

        The Add Team name popup will be displayed.

        Add Team Name Popup
      3. Select a size and specify the quantity required for that size.
      4. Click Add Another Size to specify quantities for each size required.
      5. Click Next.

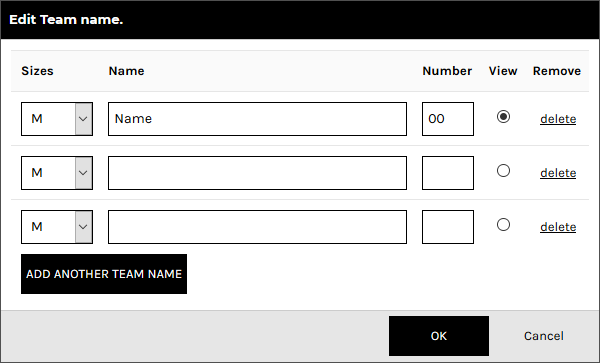
        The Edit Team name popup will be displayed containing Name and Number fields to match the quantities specified in the Add Team name popup.

        Edit Team Name Popup
      6. Configure team names by entering the team name and number for each product to be decorated.

        The item selected in the View column will be the item that is displayed in the Designer.

      7. Click Add Another Team Member and specify the team name and number for each additional product required.
      8. Click OK when done.

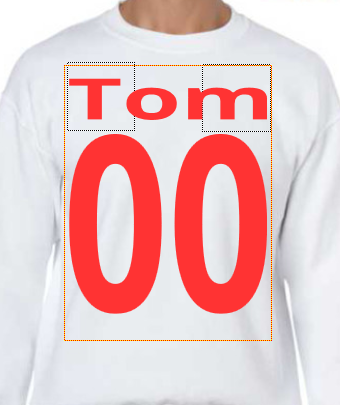
        The team name and number will be set up on the product as text areas whose properties may be adjusted as per normal text, except that any changes made will apply to all team name products.

        Team Name On Product

        See the section, To adjust the properties of text in the Designer, above, for details on how to adjust the formatting, adjust the position and apply effects to the text fields.

      9. If you want to edit the teamnames and numbers, select a text area and click Edit teamnames in the Text Properties panel to display the Edit Team name popup.